Crestline Sunliner: Rotisserie-build, built to travel. EFI,OD,AC, cruise control


- Make: Ford
- Model: Sunliner
- Type: Convertible
- Trim: Crestline
- Year: 1952
- Mileage: 3000
- Color: Green
- Engine size: 302
- Number of cylinders: 8
- Power options: Air Conditioning, Cruise Control
- Fuel: Gasoline
- Transmission: AOD
- Drive type: RWD
- Interior color: Tan
- Options: Convertible
- Vehicle Title: Clear
- Location: Tulare, California, United States
Description
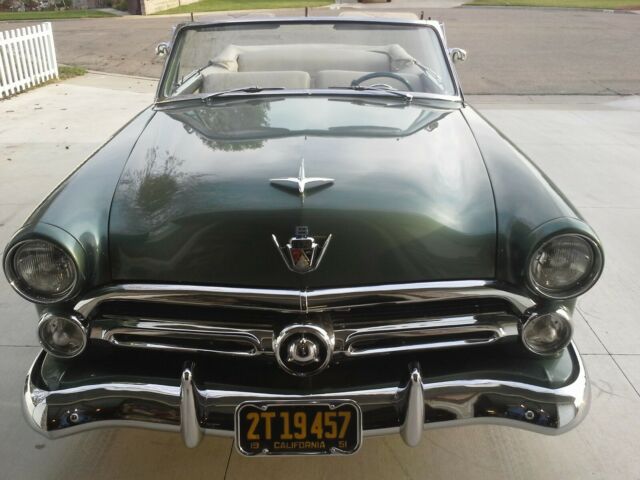
1952 Ford Crestline Sunliner Convertible
** VEHICLE ALSO ADVERTISED LOCALLY, SO AUCTION MAY END EARLY **
OVERVIEW
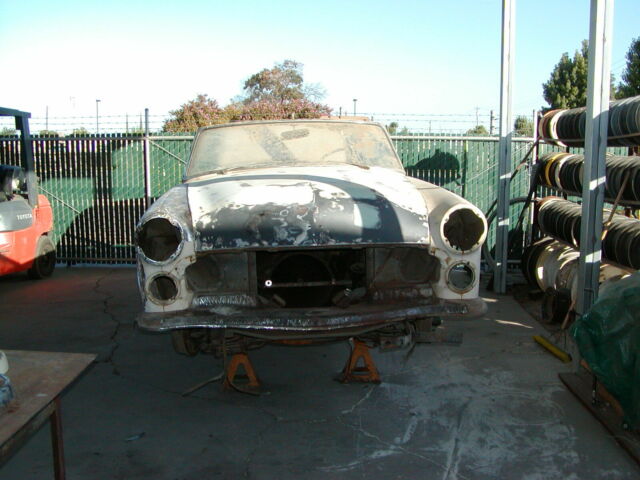
This was our second full build after our ’57 BelAir coupe.Similar to others in our fleet, it was built as a “keeper”.Other members of our family bought this over 40 years ago as a rolling shell.After finally realizing they would not be able to get around to restoring it, we decided to assist.
Sometime in the year 2000, we struck a family-deal for the car and its parts and began a rotisserie build-up.Midway through the build, it seemed only right to make it drive-able for any of the family members.Also, we decided it should be able to be driven anywhere and in any weather.By the end of 2001, the vehicle turned out just as we planned and set us on the path of how we wanted our future builds to behave.This car is also on our website diasclassiccars.com on the PROJECT GALLERY page.
Brand names and vendor names will be in all-caps and bold.
CHASSIS
The entire frame was stripped and cleaned. There was no prior damage to repair, so it was immediately sent out for gloss-black powder coat.
The stock rear differential gutted, cleaned, powder coated and then assembled with a new positive-traction (posi) unit and 3.25:1 gear set.Of course, all new bearings and seals were installed.The original rear drum brakes were completely rebuilt with new components.
Since these classic Fords are not as “main-stream” as muscle-cars, there is not a lot of “direct bolt-on” upgrades.Therefore, we didn’t hunt around for polyurethane bushings and 4-wheel disc brake kits. Also, this was being built to be a comfortable highway cruiser and not a boulevard brawler.Standard rubber bushings were used throughout.The most exotic part of the suspension is a JAMCO Deluxe 3” lowering kit.Their new front and rear drop-springs, shock absorbers and sway bars replaced all of the original parts.The front upper and lower A-arms were powder coated silver. New ball-joints attach to the stock spindles where disc brakes were donated from a Monarch.
With the engine swap taking up more space than the original flat-head, this build originally employed a tiny 8” vacuum-assist booster unit behind a Monarch master cylinder for the braking action.Even with plenty of vacuum provided by the engine, the small booster just never gave a good, comfortable “feel” to the brakes.A few frustrating years later we started over and hung a HYDRA-TECH GM-style hydroboost power brake unit on the firewall along with a GM disc/drum master cylinder.Problem solved.
The steering components were all replaced with MOOGcomponents and we adapted a CPP GM 500-series box for the power steering chores.This connects to a properly modified early GM van steering column with shift indicator, tilt function and cruise control stalk.
A four-wheel “thrust” alignment rounds out the rolling chassis/steering to make sure everything rolls in the right direction.
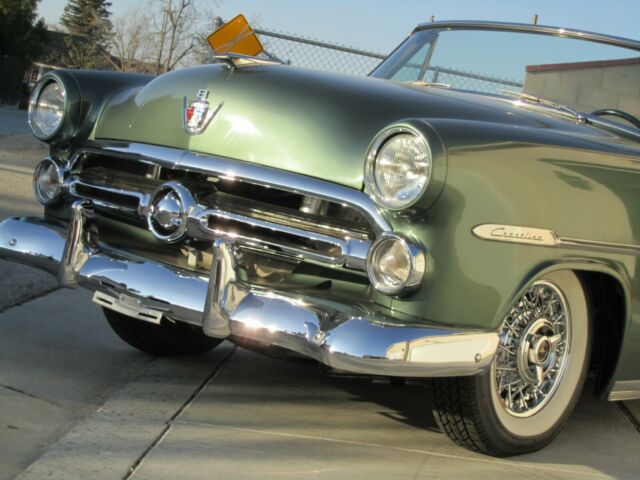
Chromed Thunderbird-style wire wheels were added for a touch of class.They are 15” X 6” wrapped in 215/70-R15 wide-whitewall tires.
BODY and PAINT
The shell “tub” was bolted to our rotisserie to keep it rigid and allowed us full access and mobility. As the pictures dictate, it was machine stripped down to bare metal. A handful of steel patch panels were cut-to-fit from random spare sheet metal components.These patches were appropriately welded in place and manipulated to require minimal body-filler for completion.After all of the torching, welding, and shaping was complete, the body, fenders and doors were attached to the rebuilt chassis.At this point, the block-sanding began.As the panels advertise, the priming and tedious blocking continued for several hours in total.Prime / block / rinse / repeat.
After the obscene amount of block sanding, we decided to check our work in a slightly “old school” way that I learned when I was working in various paint/body shops in Tulare around the mid ‘80s:We contacted our paint supplier and asked if they had any gallons of single-stage (clear coat not required for gloss) paint that was either mixed as a wrong color or simply not picked up by a customer?Back in the day, we called these various amounts of misfit paint “oops”, and a gallon is usually around ¼ of the price of the final product.Our PPG people said they had a gallon of a cream / off-white “oops”.Since white doesn’t show depth or reflections, we really were looking for a color of some sort.However, beggars can’t be choosers.SO, after final blocking we prepped the car for paint.We shot three coats of epoxy sealer on the car and then three coats of the single-stage.This puts gloss on the car to see how the finished product will look with the final base-coat / clear-coat paint.Spraying this “test” single-stage also “seals” the body fillers, primers and putties under a hard shell to ensure there won’t be any issues when spraying the more expensive BC/CC.
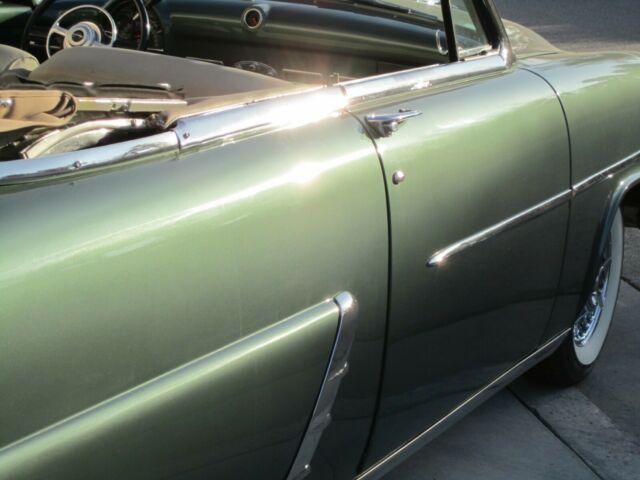
We were very happy with how the labor turned out.A few tiny ripples were located and removed while the entire car was block wet-sanded with 1000-grit abrasives.The entire car was prepped one more time and the Hyundai “Elm Green Mica” PPG base-coat was mixed thoroughly.Three coats of BC were applied – each coat in a different direction to equally distribute the metallic and pearls.After we were happy with the color application, four coats of PPG urethane clear was applied.After cured, it was sanded and polished for depth and clarity.
All of the trim was either re-plated or re-polished.The bumpers were re-chromed as well.
A restored matched pair of original 1951 Year-Of-Manufacture (YOM) California license plates (with required ’52 tab) are installed with current registration.These really finish off the luxurious look of the exterior.
DRIVETRAIN
* ENGINE:An early ‘80s 302 Windsor engine came with the car, so it was dropped off at RPM MACHINE in Tulare, CA for the usual treatment.The block, heads and rotating assembly were disassembled, cleaned, bored, balanced and assembled with a new rebuild kit.
An aluminum intake was added to breath better with a mild street cam pushing COMPETITION CAMS roller-tip rocker arms.Some Ford passenger car exhaust manifolds get rid of the exhaust through some large (quiet) FLOWMASTER mufflers.No porting work or exotic parts here.Just a very smooth street engine with probably around 250-275 horsepower.Up front, a self-tensioning VINTAGE AIR “front-runner” serpentine drive kit handles cooling, charging, AC compressing, and hydraulic power chores. APOWERMASTERgear-reduction starter was secured in the proper location.
On top of the intake, we clamped down a 700-cfm HOLLEY throttle-body EFI unit.At that time, the “Commander 950” was the current computer/harness setup.Also installed was an ACCEL electronic Ford distributor with TFI module.Plugging the TFI into the EFI harness allows the C950 to electronically control the timing along with the fuel.
A RON DAVIS custom aluminum radiator complete with transmission cooler, shroud, and dual fans was ordered and eventually bolted in place.
After the exhaust was locally fabricated, I installed a base tune in the C950 and synchronized the static ignition timing.Father and I fired the engine and properly broke-in the flat-tappet cam and lifters.
It was an exciting day when this ’52 Sunliner was actually under its own power for the first time in several decades.
This engine / transmission combination ran good, but it was never really GREAT.Since we don’t have a chassis dynamometer, I was constantly laptop-tuning the C950 (which was not capable of self-tuning) while having Dad drive the car in real-world conditions.Still, it ran well, but not GREAT.Fast-forward a few years - - After going as far as we could with the C950, we finally decided to abandon that ECM and upgrade to the new HP ECM and associated harness.
Finally, this 302 started running better and smoother.The HP ECM is leaps and bounds better than the Commander series.The tunability of the idle and transition maps provides much better performance across the board.
After dialing-in the fans, timing and air-fuel ratios we let it self-tune the rest.The car started running better than it ever had….and continues to get better.
One of the challenges of transplanting a later-model motor into an older-model chassis was oil filter location.Although we were able to MAKE it work, we could only use a very small oil filter.With respect to engine longevity, we decided to install an oil filter relocation setup.A TRANS-DAPT system was purchased to facilitate the use of a full-size oil filter.One dash-8 braided line takes the dirty oil directly to the remote one-quart filter and another dash-8 line brings the clean oil back. Bulletproof and simple.
*TRANSMISSION:A similar-era Ford C4 three-speed automatic transmission was rebuilt locally and installed behind the 302.Now the car was back on the ground as a rolling assembly.We took some measurements underneath and a new driveshaft was created to complete the new drivetrain.
We were now driving the car more and more and decided it needed one more gear.Out came the three-speed C4 trans.
I ordered a Ford “AOD” (Automatic Over Drive) crate transmission from PERFORMANCE AUTOMATIC TRANSMISSION CENTER (PATC), which slipped right in place of the C4.This brought the car closer to perfection by adding the overdrive gear of .67 for stress-free cruising.
ELECTRICAL and OPTIONAL EQUIPMENT
We use AMERICAN AUTOWIREfor all of our builds – whether for a customer or ourselves.They were selected for this build as well for complete wiring in the entire car – head lights to tail lights. This entirely new electrical system is being fed by a red-topOPTIMAbattery to avoid the all-too-common messy damage caused by leaky (acid) flooded batteries. A 4.3-ampCTEK8-step battery conditioner/maintainer was hardwired, which is something we do to every vehicle we build.Since classic cars tend to sit for months or years without daily use – this maintainer will keep this classic ready to go at any time.
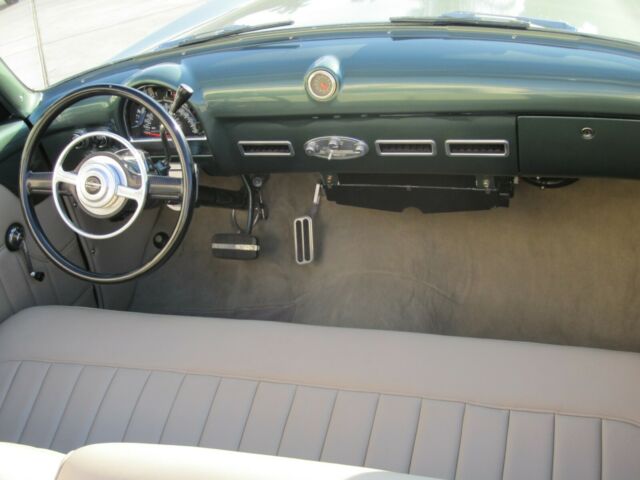
We are dealers/installers for DAKOTA DIGITALand nowadays we use their VHX-series gauges.However, they were not making a gauge cluster for this vehicle at the time of the build.We contacted CLASSIC INSTRUMENTS and they agreed to make this a custom installation using the original bezel and housing.The final product provides fuel level, oil pressure, water temperature and alternator voltage.An electronic tachometer is now present and the electronic speedometer provides accuracy as well as easy calibration for any future changes.A matching electric clock occupies the same space as the original.
There were several knobs and controls on the right side of the dash panel that were no longer in-use.We replaced the area with a solid piece of sheetmetal and relocated the important controls to the left side.
A completeair-conditioning system from VINTAGE AIRwas installed, including heat and defrost functions. The entire unit is controlled by one of their billet control panels.
Stock headlamps during the 1950s were barely adequate for THAT era.Now that this vehicle is capable of traveling significantly faster than when it was new – we upgraded the forward lighting.HELLA E-Code H4 halogen replacements were installed and adjusted.
Cruise control was added to complete the elegant nature of the build and relieve tension of long-distant drives and cruises.The switch cluster for the cruise is mounted on the turn signal stalk to provide form equal to function.
INTERIOR and TOP
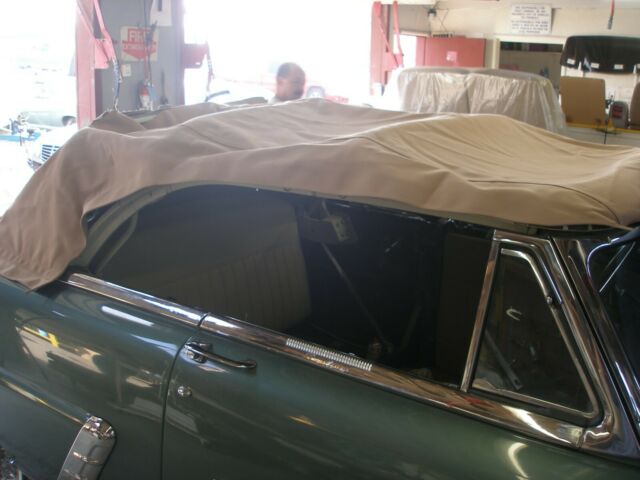
Before our vehicles go off-site for upholstery, we install copious amounts ofDYNAMATsound deadening insulation. After that was in place, a new windshield was installed with new side-glass to keep it company.We upgraded the wiring to the completely new convertible top mechanism.
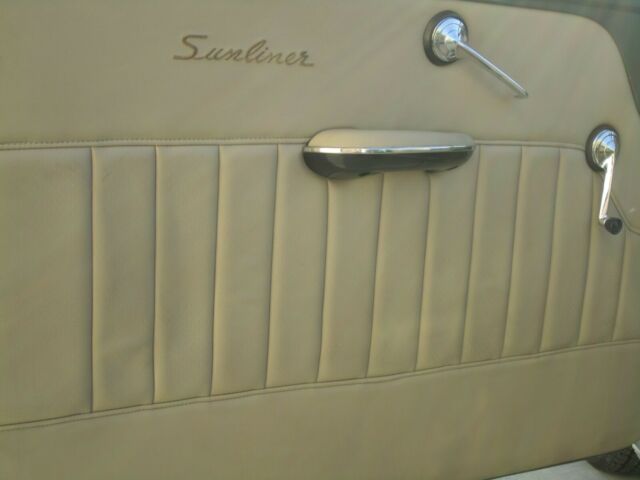
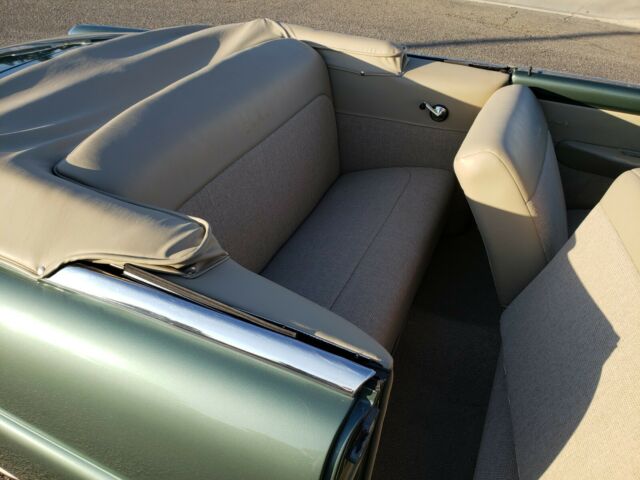
The Sunliner was then taken toMARK’S UPHOLSTERYin Visalia, CA for its custom convertible top, which has a custom GLASS rear window.After the top was done, additional sound deadening was laid onto the floor under high quality carpet.Light brown Cadillac Escalade perforated leather was used throughout the car along with tweed accents.
SUMMARY
At Dias Classic Cars, we have a theory;With all of the modern vehicle retro-fit parts available, there is no reason a person or family should have to FIGHT a vehicle.My father and I grew up just like the next car-guys.Scraping money and parts together to keep each vehicle under its own power to and from work or school day-to-day.Cars that overheated from time to time (most of the time).Pickups that needed sixteen whacks at the throttle to get it to start.Others that needed to be started with the throttle wide-open because it was flooded.
We have several modified vehicles in our family.If I need my wife, mother, friend – or anybody to drive one of the cars for me, there are no surprises or lengthy instructions needed.There are no tricks or battles to drive the cars we build or have built.The fuel injection makes the engine idle at the touch of the key – in any weather – with no manipulation of the throttle whatsoever.Put the shifter to OD and the transmission shifts smooth and quick all by itself.Turn on the AC on a hot day and the cold air starts blowing from the vents / which also triggers the cooling fans to keep the condenser efficient and coolant temperature in check.The engine doesn’t stall at idle when put into gear – nor when the AC compressor kicks in and out…because the EFI maintains the same idle speed regardless of engine load.
Today’s aluminum radiators make overheating virtually impossible and the upgraded/updated braking system allows the vehicle to stop just as good as any daily-driver.
That being said, this has been a very challenging build from the very start.As mentioned, these cars are not something you see every day cruising the streets.Finding original parts is a job in itself.For this project, the parts battle helped direct the recipe into a different realm.If it was easy to just get each and every replacement part we needed, it would have just been a boring original looking car.Subsequently, it would have also been an extremely boring vehicle to drive.The old-school steering equipment, original flat-head engine, drum brakes, three-speed manual transmission and factory suspension would have made the car very difficult to accelerate, navigate and stop seamlessly with today’s traffic and roadways.
INSTEAD, the final product has made the difficult portions well worth the effort(s).This car drives extremely smooth and straight.It turns and handles significantly better than could have ever been possible – even when it was brand new.It now stops quick and straight and can safely navigate today’s busy roads with bumper-to-bumper traffic.This Sunliner instills driving confidence whether idling through a crowded parking lot or on cruise control at 80 mph on a freeway from town to town.
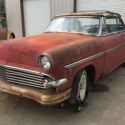
 1952 Ford Crestline SUNLINER
Mileage: 3200
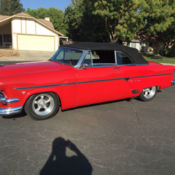
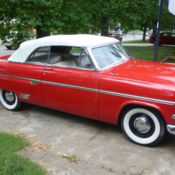
 !954 Ford Crestline Sunliner Convertible
Mileage: 99159
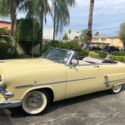
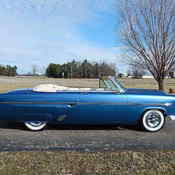
 1954 Ford Sunliner Crestline
Mileage: 86997
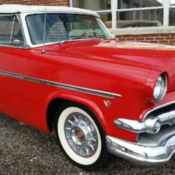
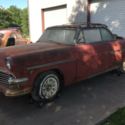
 1954 Ford Crestline Sunliner
Mileage: 1
 1953 CRESTLINE SUNLINER CONVERTIBLE
Mileage: 7338
 1954 Ford Crestline Sunliner Convertible
Mileage: 71,000
 Ford Crestline Sunliner 1954 Convertible
Mileage: NA
 1954 Ford Sunliner Crestline Convertible
Mileage: 89776
 Custom 1954 Ford Crestline Sunliner
Mileage: 1,500
 1953 Ford Sunliner Crestline Convertible